


I used to scroll through those perfect henna tutorials on TikTok and immediately feel exhausted. All that talk about “prepping your workspace” and “achieving symmetrical mandala perfection” — who has time for that? When I wanted to try henna for my friend’s mehndi party last month, I needed a method that worked without turning it into a three-hour art project.
Turns out, good henna doesn’t require Pinterest-level precision. It just needs to be mixed right, applied with confidence, and left alone to do its thing. After accidentally creating some of my favorite designs while being completely lazy about the process, I figured out exactly which steps matter and which ones are just Instagram noise.
The 30-Second Brief
Here’s what we’re actually doing: mixing henna powder with liquid, putting it in a squeeze bottle, drawing simple patterns on clean skin, and waiting for it to stain. That’s it. No sacred rituals, no perfectly sterilized workspace, no geometric precision.
The whole thing takes about 20 minutes of active work, then you wait. Most of that waiting happens while you’re doing other things anyway. And if your design looks a bit wonky? That’s called “organic” and “handcrafted character.”
The Bit Where You Don’t Overthink Materials
You need four things. Maybe five if you’re feeling fancy.
- Henna powder — The pre-made stuff from health food stores works fine. Don’t stress about sourcing ancient Pakistani henna unless you’re planning to open a salon.
- Lemon juice — Fresh or bottled, whatever’s in your fridge. This helps the dye release.
- Sugar — Regular white sugar. Keeps the paste from cracking off too soon.
- Squeeze bottle or plastic bag — I use old mustard squeeze bottles. Clean them out and you’re set.
- Essential oil (optional) — Eucalyptus or tea tree if you have it. Deepens the stain slightly.
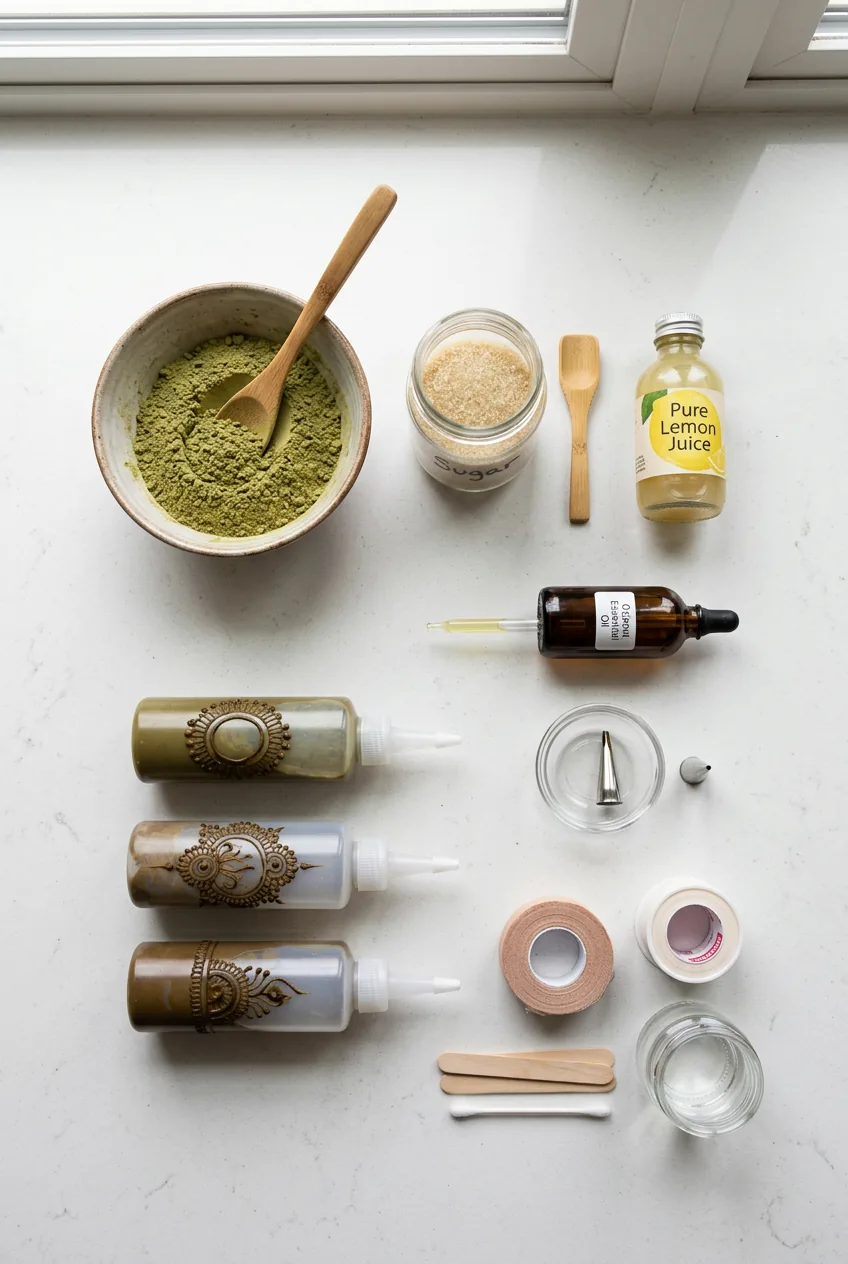
That’s literally it. No special brushes, no mixing bowls blessed by henna goddesses, no temperature thermometers. I’ve seen tutorials that require more equipment than making sourdough starter, and honestly? Those designs don’t look any better than mine.
Basic Skin Prep That Actually Matters
Clean skin gets better staining. That’s the only prep rule that actually impacts your results.
Wash the area with soap and water. Dry it completely. If you’ve got lotion or perfume on that spot from earlier, scrub it off with a bit of rubbing alcohol on a cotton pad. Dead skin flakes will make your lines look fuzzy, so exfoliate gently if you notice any.
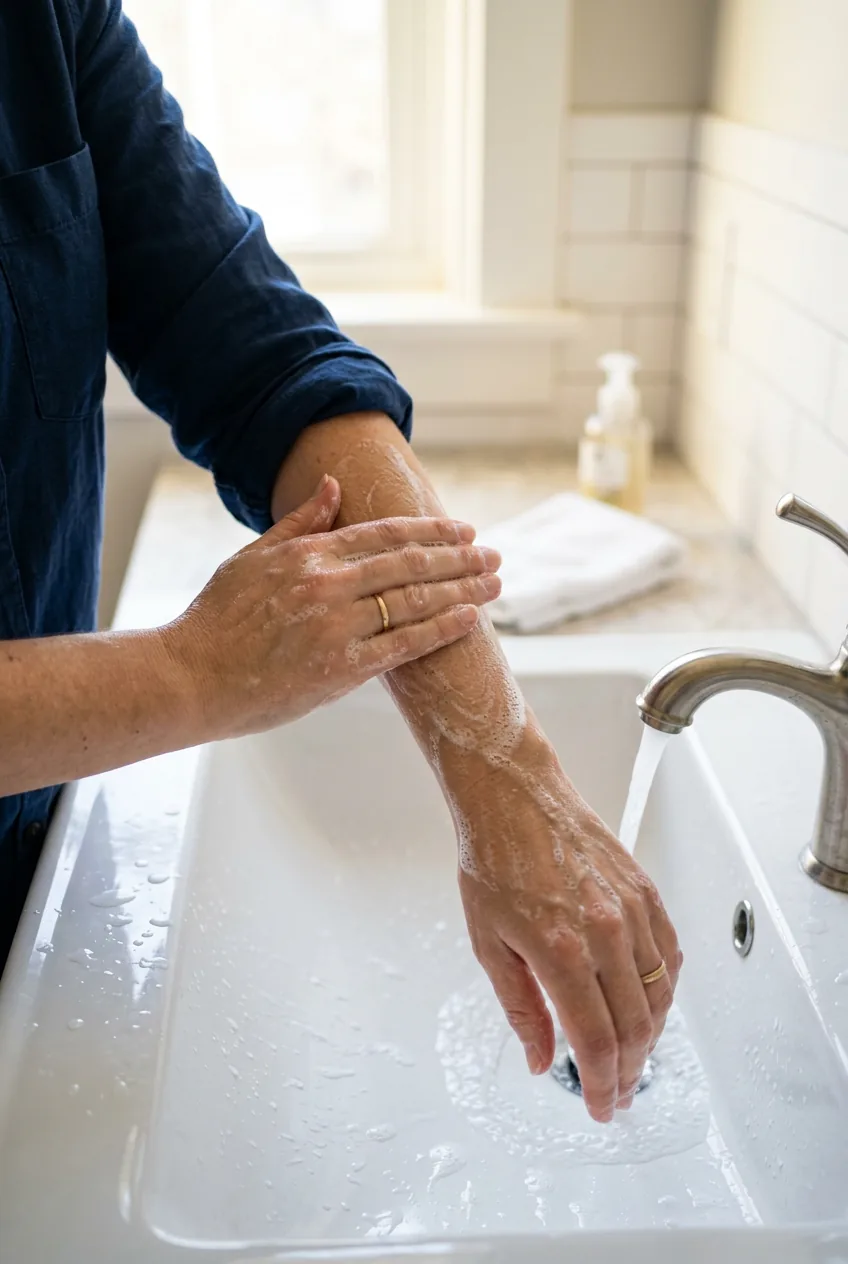
Skip the elaborate “skin barrier preparation” routines I see online. No pre-staining oils, no special cleansing sequences. Your skin is not performing surgery — it just needs to be clean and dry.
Mixing Henna Without Drama
Start with about 1/4 cup henna powder in a bowl. Add lemon juice gradually until it reaches thick yogurt consistency. I’m talking Greek yogurt, not the watery stuff.
Stir in one tablespoon of sugar and a few drops of essential oil if you’re using it. The mixture should hold its shape when you lift the spoon, but still squeeze easily through your bottle tip.
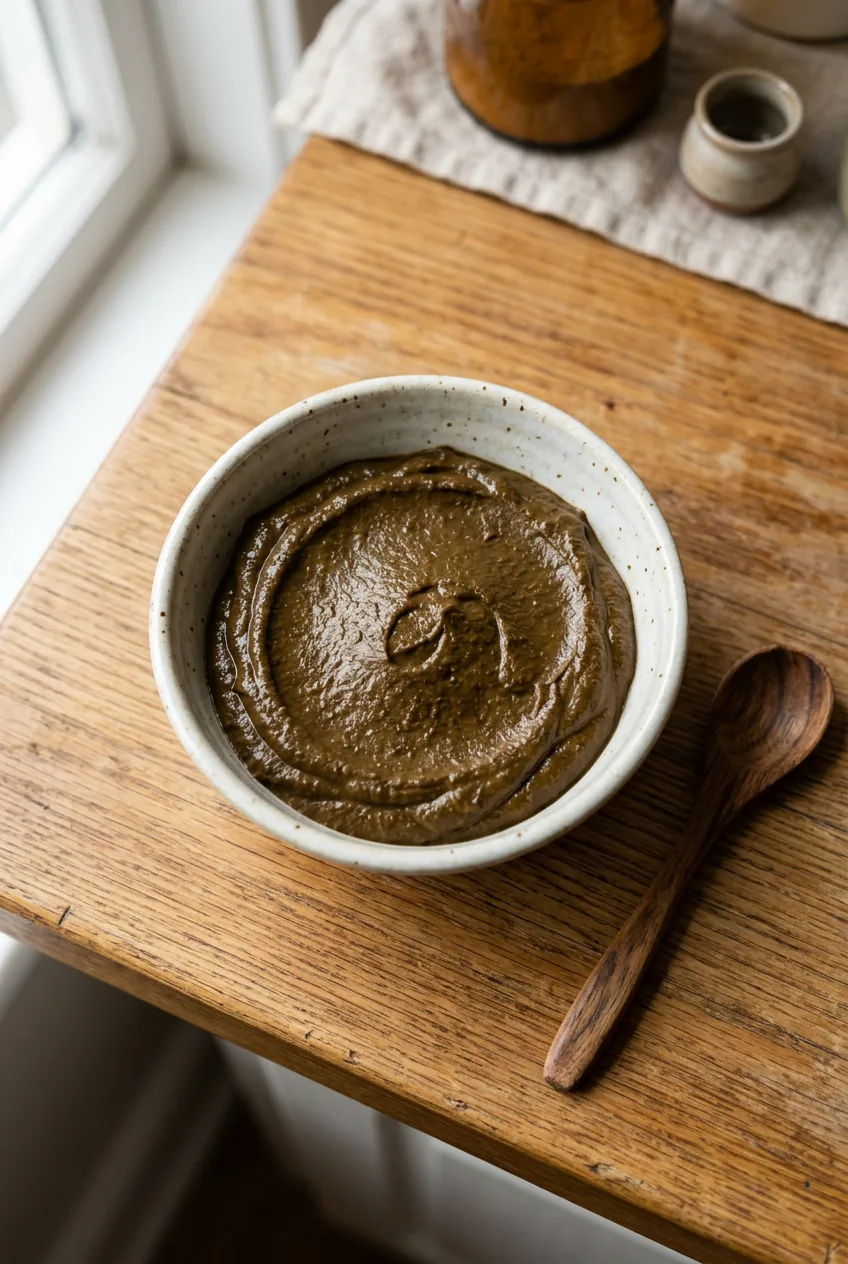
I once made my henna way too thick because I was afraid of it being “too runny.” Trying to squeeze concrete through a tiny bottle opening is not fun. Add liquid slowly, but don’t be scared of a slightly looser consistency.
Cover the bowl and let it sit for at least 30 minutes. This “dye release” time lets the henna activate. You can leave it up to 12 hours if you forget about it — longer is often better for color intensity.
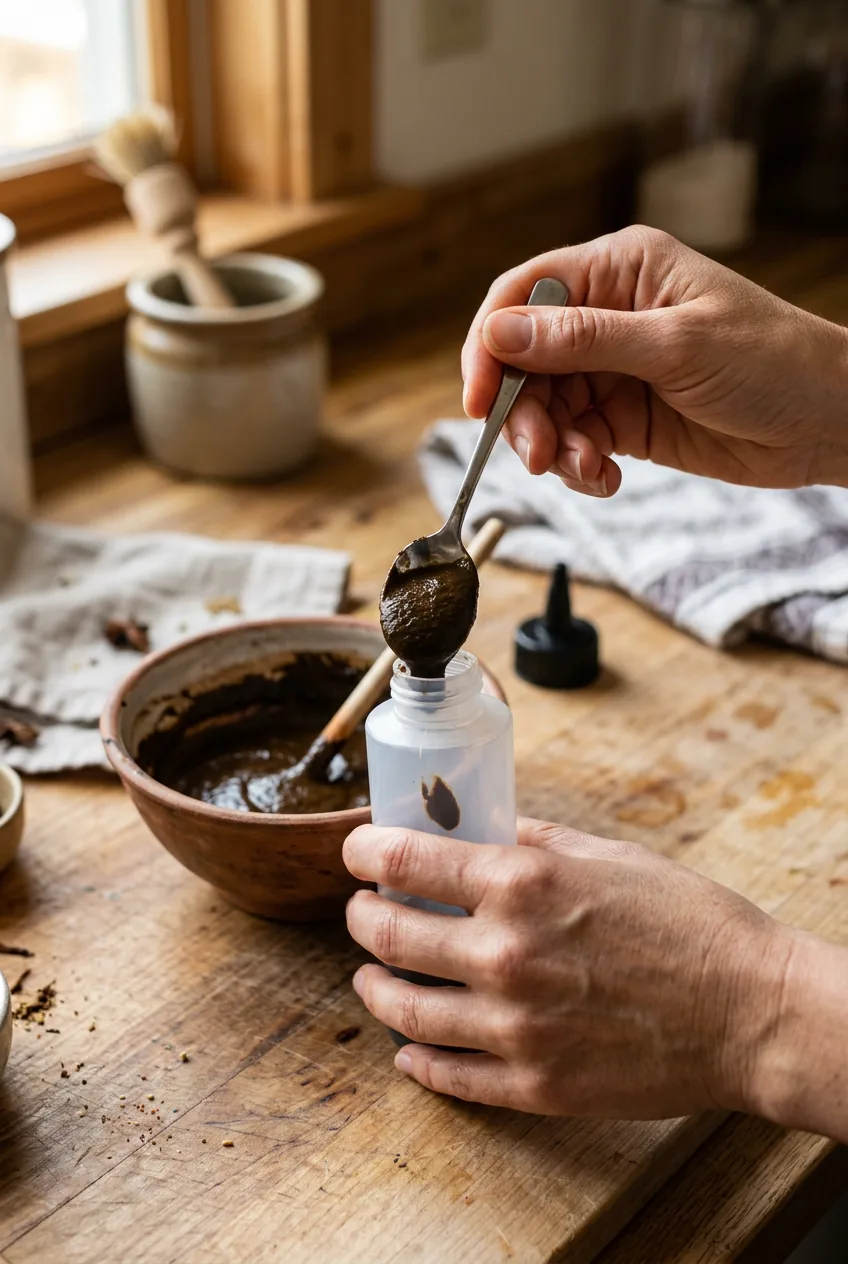
When it’s ready, transfer to your squeeze bottle. Cut the tip to create an opening about the size of a toothpick. Test the flow on paper first.
Application That Looks Intentional
Start with simple patterns. I’m talking basic vines, dots, simple geometric shapes. Save the intricate mandalas for when you’ve gotten the hang of controlling the squeeze bottle.
Hold the bottle like a pencil, about an inch above the skin. Gentle, steady pressure. Move slowly and deliberately — rushing creates wobbly lines. If you mess up, scrape it off immediately with a toothpick and start that section over.
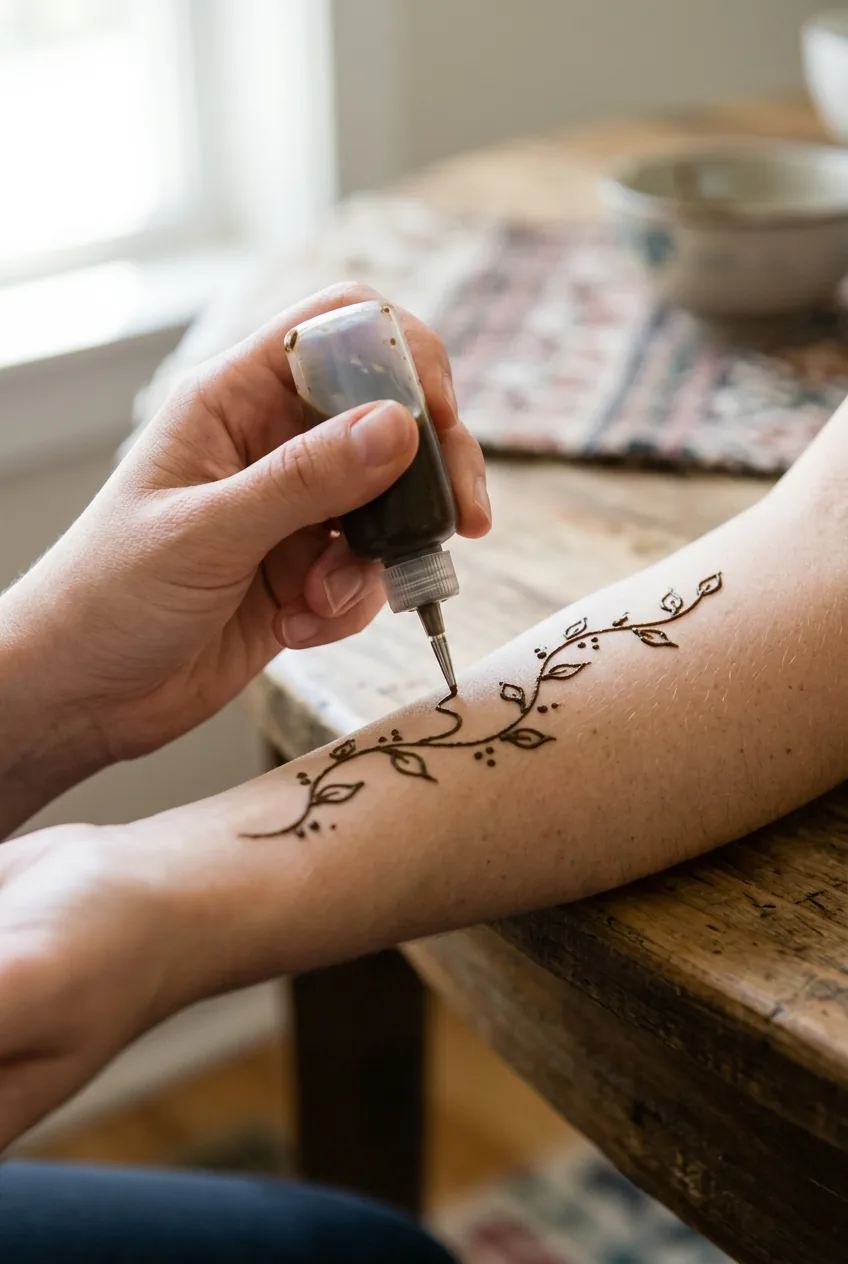
For beginners, I recommend starting on the back of your hand or forearm. The skin is flatter there, making it easier to control your lines. Avoid areas that bend a lot (like knuckles) until you’re more confident.
Some people love using pre-made stencils to get started. Honestly? I prefer freehand. Even imperfect freehand looks more authentic than perfect stencil work.
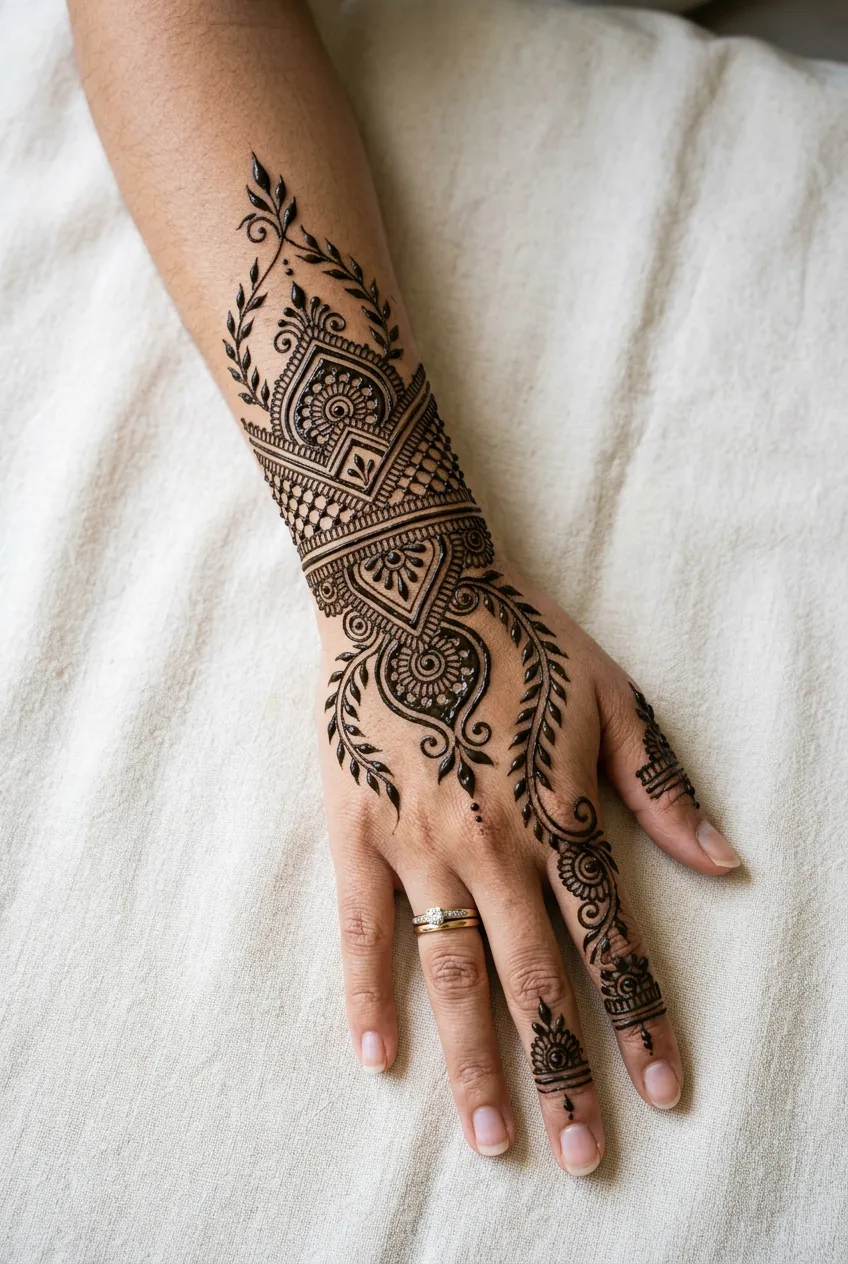
Build your design in sections rather than trying to complete one continuous line. Draw a central element, then add details around it. This approach feels less overwhelming and gives you natural stopping points if you need breaks.
Watch the Flow Technique in Action
Just Enough Aftercare
Once your design is complete, leave the paste on for at least 2-4 hours. Longer is better for darker staining. The paste will naturally start cracking and flaking off as it dries.
Resist the urge to pick at it. I know it’s tempting, especially when pieces start lifting at the edges. But premature removal equals lighter staining.
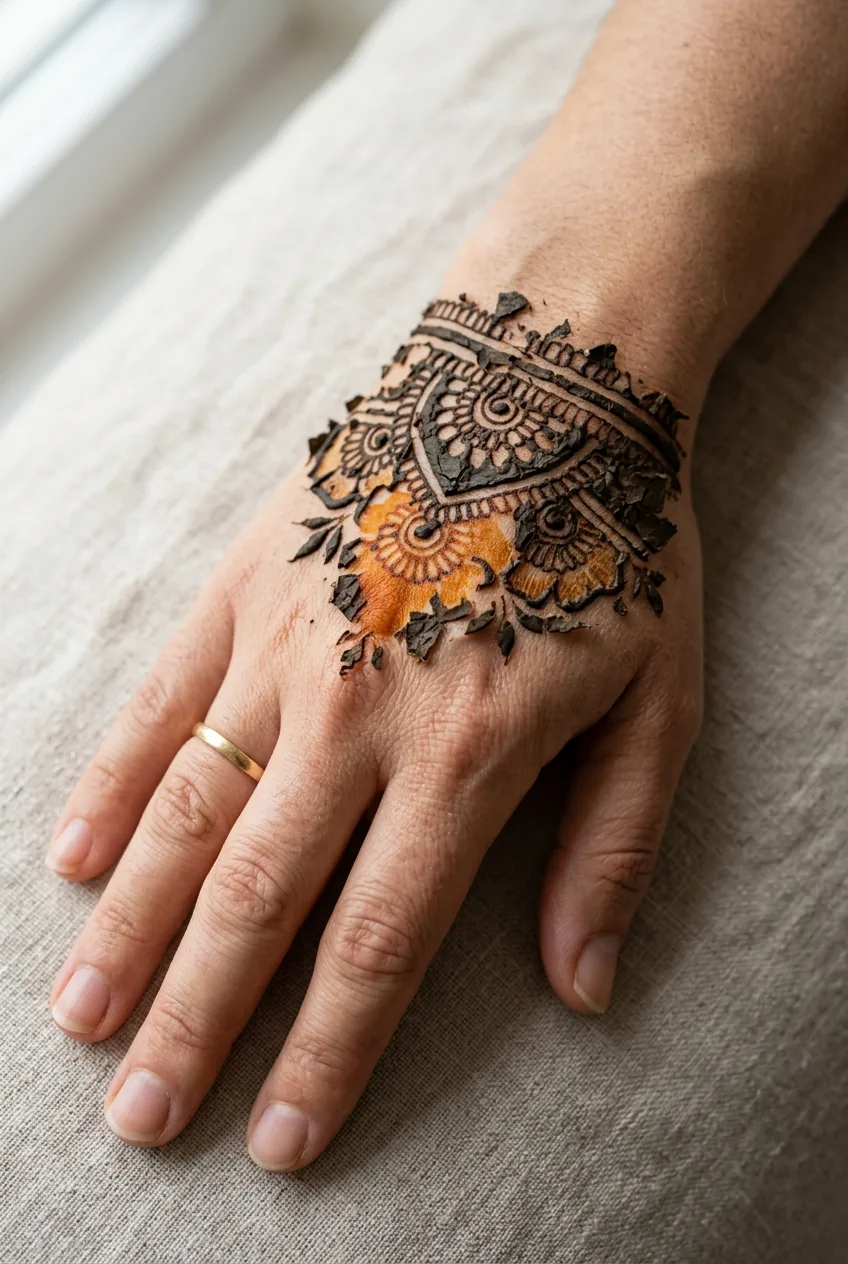
When you’re ready to remove the paste, scrape it off gently with a butter knife or your fingernail. Don’t use water immediately — give the stain a few hours to darken naturally first.
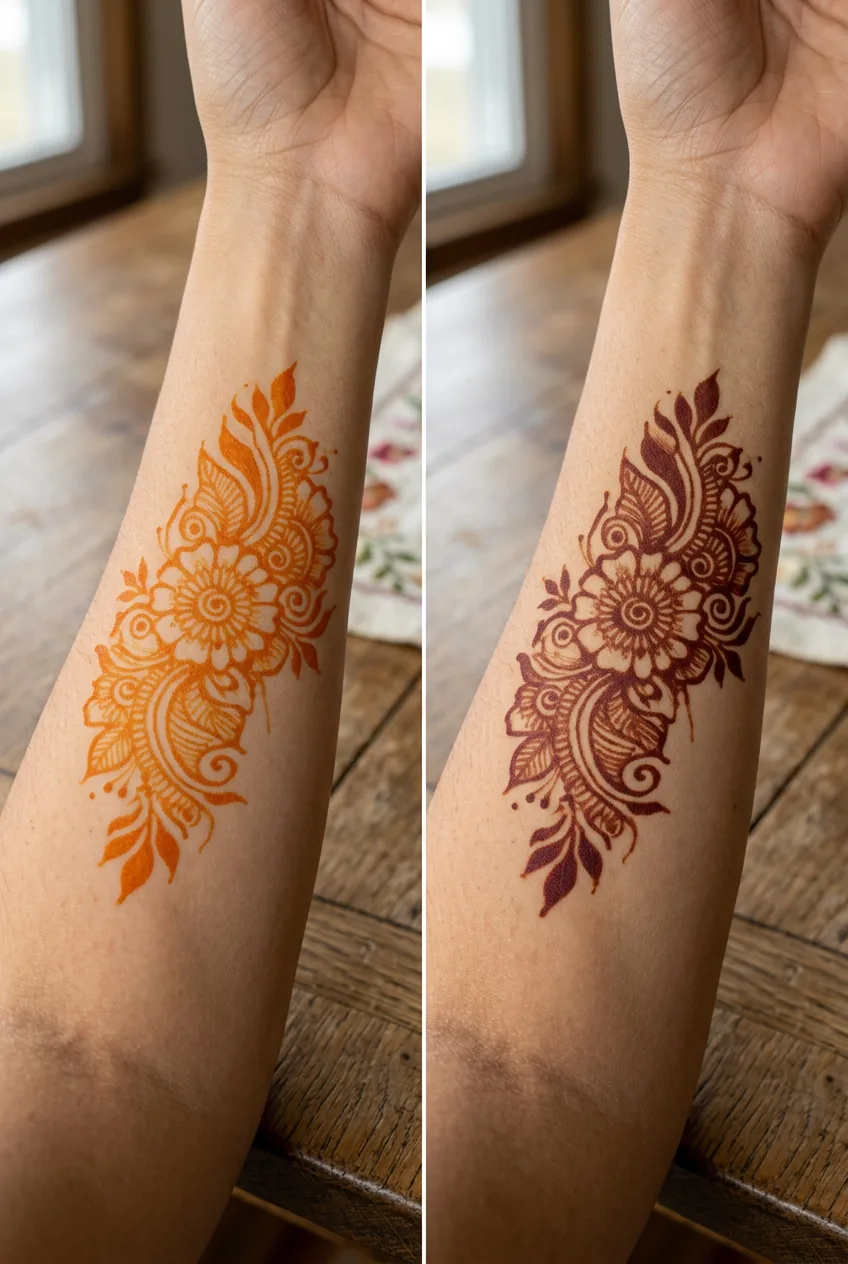
The initial stain will be orange-ish. Don’t panic. It darkens to brown over the next 24-48 hours as it oxidizes. This is normal henna behavior, not a sign you did something wrong.
To maintain the color longer, avoid scrubbing the area aggressively and moisturize lightly. The design typically lasts 1-2 weeks, fading gradually as your skin naturally exfoliates.
For anyone interested in more permanent body art options, you might want to explore dragon tattoo designs or symbolic angel tattoos once you get comfortable with temporary designs.
Quick Answers for Henna Newbies
How dark will my henna get?
Depends on your skin and the henna quality. Palms and feet stain darkest (deep brown), while arms and legs usually get medium brown. The stain starts orange and darkens over 24-48 hours.
Can I shower with fresh henna?
Avoid water for the first 12-24 hours after removing the paste. After that, gentle showers are fine, but avoid scrubbing directly on the design.
What if I mess up a line?
Scrape it off immediately with a toothpick or knife edge while the paste is still wet. You can redraw that section right away. Don’t try to “fix” dried paste — just incorporate the mistake into your design.
How long does mixed henna last?
In the fridge, about a week. At room temperature, use it within 24 hours. The paste darkens over time, which actually improves staining quality.
My first attempt wasn’t Instagram-perfect, but it was mine. The slightly wobbly vine pattern on my wrist got more compliments than I expected, probably because it looked handmade rather than stenciled. Sometimes “good enough” is exactly what you’re going for.